Skip to end of metadata
Go to start of metadata
You are viewing an old version of this content. View the current version.
Compare with Current
View Version History
« Previous
Version 6
Next »
Desde el bloque 505212 (Abril 26, 2019) Swing/HorizenGUIWallet/ZenCashGUIWallet debe de ser actualizada a la versión 0.86.0 que incluyen los binarios zend (2.0.17)
- Wallet Backup
- Wallet Upgrade
- Wallet Troubleshooting
| Respaldo de Billetera - Cada vez que se genere una nueva dirección Z o que se generen más de 100 direcciones transparente o si una llave privada es importad, el archivo walled.dat se tiene que respaldar. |
|---|
| 1 | 
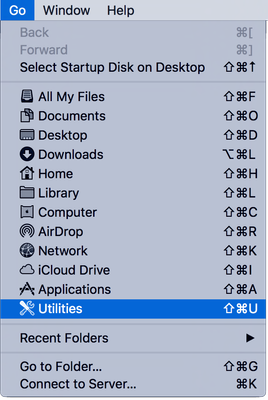
- Cierra la aplicación de la billetera si se encuentra en ejecución.
- Abra la aplicación Finder
- Da click en el menu de Go en la parte de arriba, da click en "Go to Folder..." o presiona Shift+Command+G
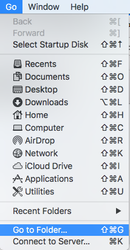
Introduzca lo siguiente:
~/Library/Application Support/Zen/

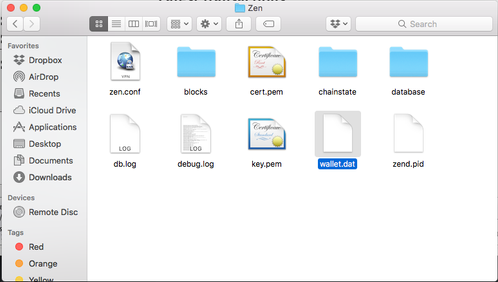
- Copie el archivo wallet.dat en una ubicación segura, como una unidad de almacenamiento USB cifrada
- Cómo crear una USB encriptada en Mac OS usando Disk Utility (Texto en inglés)
| 
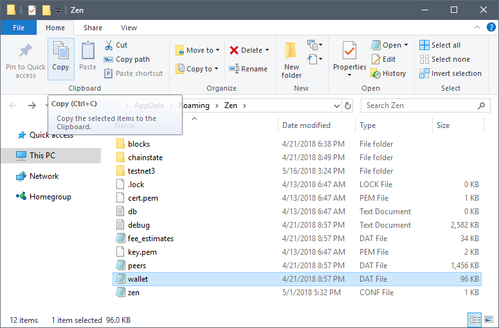
- Cierra la aplicación de la billetera si se encuentra en ejecución.
- Abra la aplicación Files
- Da click en el icono Files en el menu de Favoritos
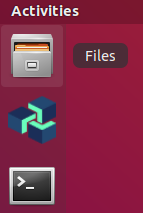 Presione las teclas Ctrl + L e introduzca lo siguiente: 

- Copie el archivo wallet.dat en una ubicación segura, como una unidad de almacenamiento USB cifrada
- Cómo crear una USB encriptada en Linux utilizando Disk Utility
| 
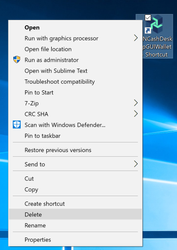
- Cierra la aplicación de la billetera si se encuentra en ejecución.
- Abra la aplicación Ejecutar
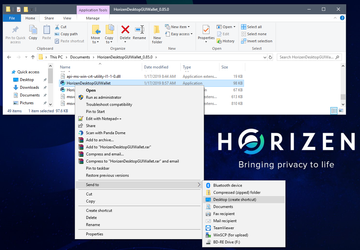
- Da click en start y escribe run (Windows 10) o presione Tecla Windows + R
Introduzca lo siguiente: 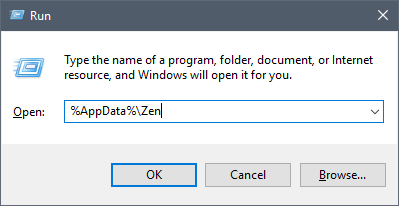
Copie el archivo wallet.dat en una ubicación segura, como una unidad de almacenamiento USB cifrada - Cómo crear una USB encriptada en Windows 10 Pro con BitLocker (Texto en inglés)
- Cómo crear una USB encriptada utilizando VeraCrypt (Texto en inglés)
|
| Actualización de Billetera |
|---|
| 2 |
Esta columna no aplicar para MacOS: El Capitan El soporte para El Capitan ya no existe.
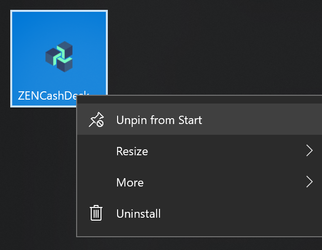
- Cierre ZENCashWallet
- Download the Wallet image file (.dmg) HorizenDesktopGUIWallet-0.86.0.dmg
- Instale la billetera
- Abre la imagen de disco 'HorizenWallet-0.85.1.dmg'
- Copie la aplicación HorizenWallet a la carpeta de aplicaciones.
- Corra la aplicación de HorizenWallet desde el launchpad.
|
- Cierre ZENCashWallet
- Ejecute la Terminal
Actualice el apt cache Instale zen, esto actualizará el servicio zend si hay una nueva versión disponible
sudo apt-get install zen -y
Instale Billetera GUI
sudo apt-get install zencash-desktop-gui-wallet -y
Empiece la aplicación HorizenWallet
| |
| Wallet Troubleshooting - Common Errors & Solutions |
|---|
| 3 | Error:A general unexpected critical error has occurred:
error: couldn't connect to server: unknown (code -1)
(make sure server is running and you are connecting to the correct RPC port) See the console output for more detailed information! | Error:A general unexpected critical error has occurred:
error: couldn't connect to server: EOF reached (code 1)
(make sure server is running and you are connecting to the correct RPC port) See the console output for more detailed information! |
|
| 4 |
- Backup the wallet.dat, using the instructions in the Wallet Backup instructions above
- Launch Terminal
- From the Finder Open the Utilities Folder
- Open Terminal
- Re-Scan your blockchain
Paste/Enter the following into your terminal
/Applications/HorizenWallet.app/Contents/Java/zend --rescan
- Press 'Ctrl + C' to exit the zend daemon after re-scanning is complete
- Open your HorizenWallet and it should load
- Note the progress of the Blockchain synchronization in the lower right hand corner
- If this does not solve your error, continue to the next step
- Re-Index your blockchain (This will take a very long time, 20+ hours)
Paste/Enter the following into your terminal
/Applications/HorizenWallet.app/Contents/Java/zend --reindex
- Press 'Ctrl + C' to exit the zend daemon after re-indexing is complete
- Open your HorizenWallet and it should load
- Note the progress of the Blockchain synchronization in the lower right hand corner
|
- Backup the wallet.dat, using the instructions in the Wallet Backup instructions above
- Launch Terminal
- Re-Scan your blockchain
Paste/Enter the following into your terminal - Press 'Ctrl + C' to exit the zend daemon after re-scanning is complete
- Open your HorizenWallet and it should load
- Note the progress of the Blockchain synchronization in the lower right hand corner
- If this does not solve your error, continue to the next step
Re-Index your blockchain (This will take a very long time, 20+ hours) Paste/Enter the following into your terminal
- Press 'Ctrl + C' to exit the zend daemon after re-indexing is complete
- Open your HorizenWallet and it should load
- Note the progress of the Blockchain synchronization in the lower right hand corner
|
- Backup the wallet.dat, using the instructions in the Wallet Backup instructions above
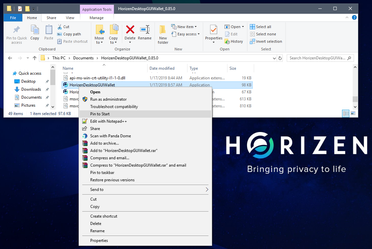
- Locate the zend.exe from where your HorizenDesktopGUIWallet is installed and note the location from the address bar. Example: `C:\Users\zenops\HorizenDesktopGUIWallet\app`
- Launch command prompt
- Hit 'Windows Key + R', type 'cmd' and hit <enter>
Change directories to the location noted earlier using the 'cd' command
cd C:\Users\zenops\HorizenDesktopGUIWallet\app
- Re-Scan your blockchain
Paste/Enter the following into your terminal - Press 'Ctrl + C' to exit the zend daemon after re-scanning is complete
- Open your HorizenDesktopGUIWallet and it should load
- Note the progress of the Blockchain synchronization in the lower right hand corner
- If this does not solve your error, continue to the next step
Re-Index your blockchain (This will take a very long time, 20+ hours) Paste/Enter the following into your terminal - Press 'Ctrl + C' to exit the zend daemon after re-indexing is complete
- Open your HorizenDesktopGUIWallet and it should load
- Note the progress of the Blockchain synchronization in the lower right hand corner
|


© 2019 Horizen. All rights reserved.